
The Importance of an Unobstructed Thread Path
Technician Tips · Thread Path
Obstructions along either the upper or lower thread path will sink your stitch quality, whether it shows up as skipped stitches, thread looping, or thread breakage.
A phrase that keeps popping up in my mind is “sewing machine ontology”: the set of bedrock concepts in the world of sewing machines, and how they relate to each other.
My understanding of sewing machines deepened tenfold once I wrapped my head around those bedrock concepts instead of memorizing specific fixes. Rather than encountering a problem and trying to remember the last time I saw that exact problem, I began tracing each problem back to the overarching concept it’s tied to.
This article is dedicated to one of those concepts: the unobstructed thread path. It’s worth understanding because thread path obstructions show up in a surprisingly wide variety of ways.
Review: How a Stitch Is Made
Two threads, one knot
- A stitch is essentially a knot tied between two sources of thread: the bobbin thread and the needle thread.
- The knot forms below the needle plate. When the needle reaches its lowest position and begins to rise, the thread forms a loop at the eye of the needle (on the back side of the needle).
- The whole time, the machine’s sewing hook has been rotating around the bobbin case. Its position is timed so the hook passes behind the needle, just above the eye, when the needle has risen about 2–2.5 mm above bottom dead center (its lowest position).
- That timing lets the hook point catch the thread loop as it forms. The hook carries the needle thread around the bobbin case, and the needle thread and bobbin thread form a loose knot near the top of the bobbin case.
- The take-up lever cinches the knot up into the fabric, and the upper and bobbin tension position it in the middle of the fabric.
It’s an ingenious process that requires precision, without much room for error. And it can all be derailed if either thread path is obstructed. Whether it’s the needle thread or the bobbin thread, the thread must flow freely from its source as the machine sews. Below are the most common obstructions I see, all in one place, to hammer the concept home.
Spool Cap
Too small · too big · just right
Your spool cap ought to be slightly larger than the end of the thread spool. If it’s smaller, the thread can snag on the rough plastic of the spool. If it’s much larger, the thread can still snag.
A snag is an obstruction to the upper thread flowing freely. It can prevent the thread loop from forming at the eye of the needle, which results in skipped stitches.


Read the full articleHow to Choose the Right Spool Cap
Needle Eye Too Small, or Thread Too Thick
The needle and thread must match
The thread has to flow freely throughout the stitch-making process, and one place that’s tested is the needle eye. Thread shredding often happens because the eye is too small for the thread to pass through freely. There are two ways that happens:
- The needle eye is too small, e.g. a size 65/9 needle with normal 40 or 50 weight thread.
- The thread is too thick, e.g. 12 weight thread in a universal 80/12 needle.
Either way, a mismatched needle and thread is a thread path obstruction.

Matching needle, fabric & threadTroubleshooting Loose Stitches: Needle, Fabric & Thread
Compacted Lint in the Tension Discs
Small loops on the underside
If compacted lint or shredded thread gets wedged between the upper tension discs, the discs can’t close properly. If they don’t close on the thread, your upper thread has zero tension, and you’ll get small loops on the underside of the fabric.

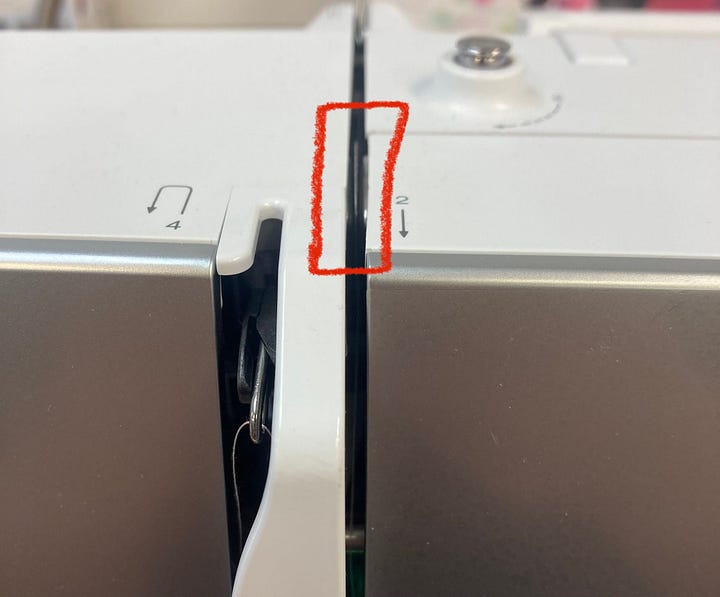

Where are your upper tension discs?
Read the full articleHow to Clean a Sewing Machine
The Pull Test
My dad’s most useful troubleshooting test
The pull test was invented by my dad, and it might be the most helpful thing I can teach a sewist about troubleshooting their machine.
It tells you whether your upper thread is in a zero-tension condition. With the presser foot raised, the thread should pull freely. With the presser foot lowered, you should feel tension. If you lower the foot and feel no tension, the tension discs aren’t closing on the thread for some reason, and that problem needs solving.
The pull test also reveals obstructions beyond the tension discs. If the thread doesn’t pull freely with the foot raised, and you feel a snag, there’s an obstruction somewhere on the upper thread path. It could be a spool cap that’s too big, too small, or nicked. It could be a nick in the machine’s plastic shell. It could be compacted lint or shredded thread stuck somewhere else. Either way, the pull test should be one of the first things you do when you see thread looping or skipped stitches.
Read the full articleThe Pull Test: The Cure for Loops on the Underside of Fabric
Lint Between the Bobbin Case Tension Discs
Small loops on the top side
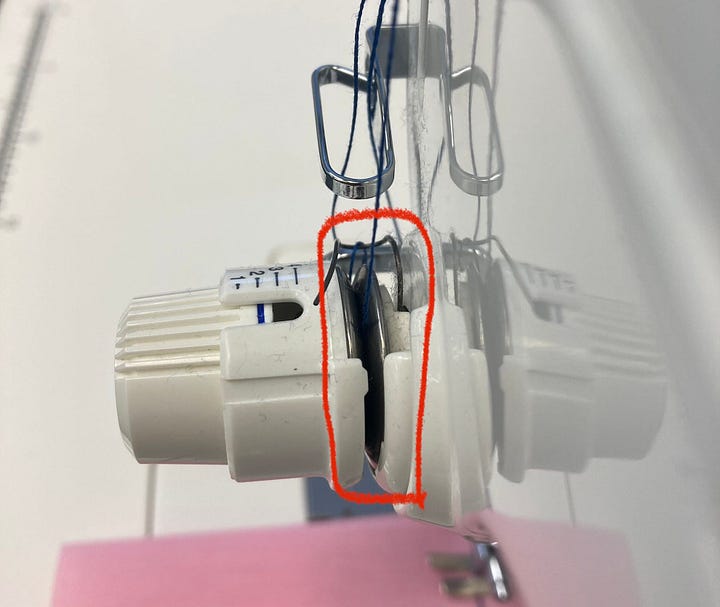
Just like the upper thread path, the bobbin thread path has to be clear. And just like compacted lint can stop the upper tension discs from closing, it can do the same to the bobbin case tension discs (circled in red below).


Bobbin case tension discs, circled in red.
If the discs don’t close properly, the bobbin thread has zero tension and gets pulled up to the top of the fabric as small loops (a.k.a. eyelashes). If you see those small loops on the top side of your fabric, clear the discs with canned air or something thin like a pin or needle.
Needle Strikes on the Needle Plate & Bobbin Case
Burrs where the thread slides
Needle strikes on the needle plate, bobbin case, and presser foot can all become thread path obstructions. Like the spool cap, these parts are designed to be extremely smooth, because the thread slides across them during every stitch. Sharp burrs from needle strikes can cause thread breakage or unwanted thread loops.

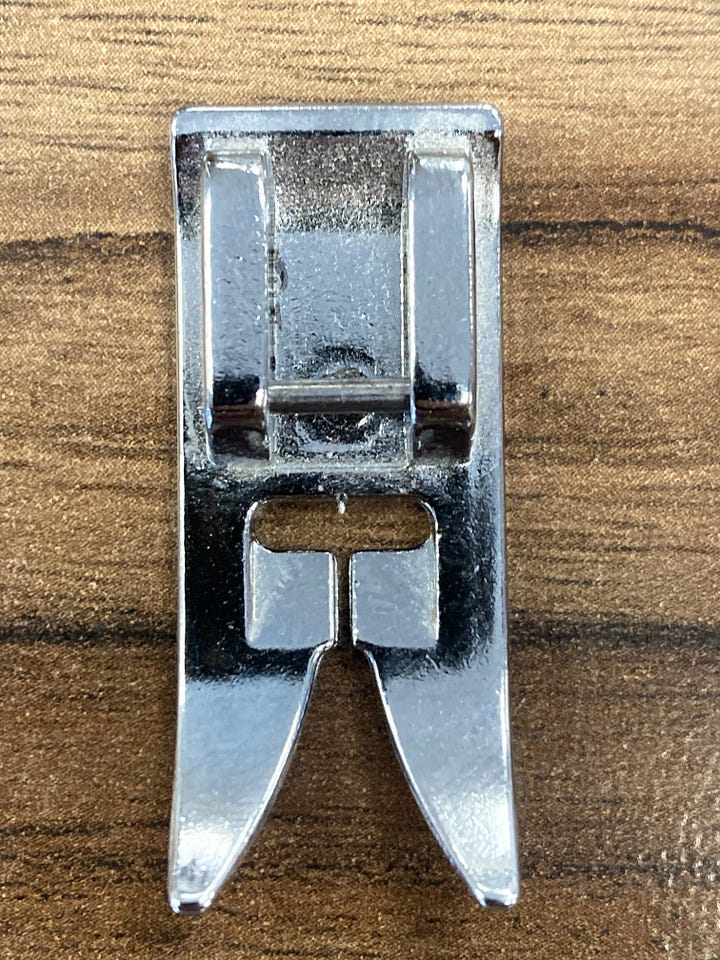
Read the full articleDamaged Needle Plate: What Causes Needle Strikes?
Poorly Wound Bobbin
The bobbin can obstruct itself
As strange as it sounds, a poorly wound bobbin is an obstruction to the bobbin thread itself.

There’s a portion of bobbin thread that’s “next up”: the next bit that will be used to make a stitch. On a tight, even bobbin, that thread flows freely. On a loose, sloppy bobbin, the “next up” thread may be buried under other loose wraps, so it has to pull through the thread on top of it. That buried thread is an obstruction in the bobbin thread path.
Read the full articleHow to Wind a Bobbin
In review
- Both the needle thread and the bobbin thread must flow freely from their source.
- Common obstructions: wrong-size spool caps, mismatched needle and thread, lint in the tension discs, burrs from needle strikes, and sloppy bobbins.
- The pull test is your first check for both zero tension and upper thread snags.
Keep the thread path clear


Thank you for reading!
If you found this article helpful, share it with your sewing friends.
— Cale
More troubleshooting
