
Sewing Thread Breaking? How to Fix
Troubleshooting Flow Chart
“My thread keeps breaking.” It’s one of the most common problems we see at the shop. Here is the exact sequence I work through, step by step, whenever a machine is breaking thread.
Start at Step 1 and sew a test seam after each step. If the thread stops breaking, you’re done. If not, move on to the next step.
— Cale
The Thread Breaking Flow Chart
Start at step 1 · test-sew after every step
- 1
Rethread with quality thread and insert a new needle
First, I rethread the machine with quality thread and insert a new needle, preferably size 80/12 or 90/14.
Old or cheap thread is brittle and is often the sole cause of breakage. You can spend $150–200 on a service, or spend a few dollars on a spool of Mettler and fix it yourself. I’ve seen it happen many times.
Then the fresh needle. Needle size corresponds with the size of the eye: a 70/10 has a smaller eye than an 80/12, which is smaller than a 90/14, and so on. A small eye (a 70/10 or 65/9) may be too small for the thread to pass through smoothly. That adds friction, which can shred the thread. A fresh 80/12 or 90/14 rules out a too-small eye, for less than a dollar.
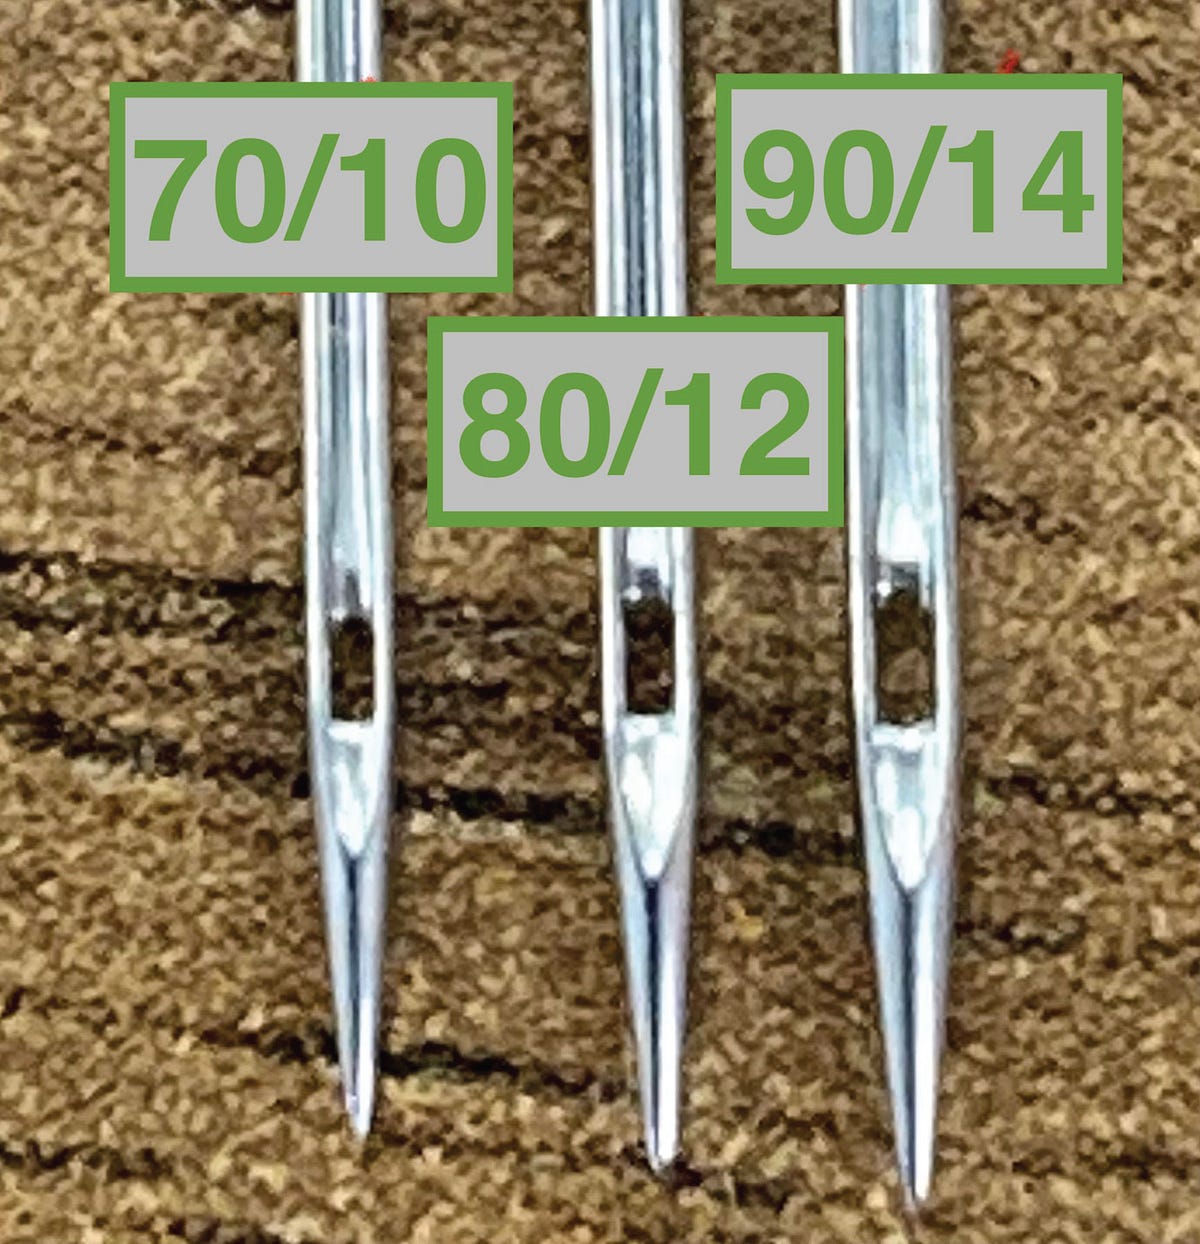
The bigger the needle size, the bigger the eye. Why cheap thread breaksPoor Quality Thread vs. High Quality Thread
Fresh needle & thread we trust
 Mettler Silk-Finish Cotton Thread
$3.30Select options This product has multiple variants. The options may be chosen on the product page
 Mettler Metrosene Polyester Thread
$3.15Select options This product has multiple variants. The options may be chosen on the product page
Fixed? You’re done. Still breaking? Continue to step 2 ↓
- 2
Check the spool cap
While you’re rethreading, take a close look at your spool cap. The end of a thread spool is rough plastic with tiny imperfections; the spool cap is smooth. If the cap is too small, the thread rides over the rough edge of the spool instead of the smooth cap, and that can cause snagging and breakage.
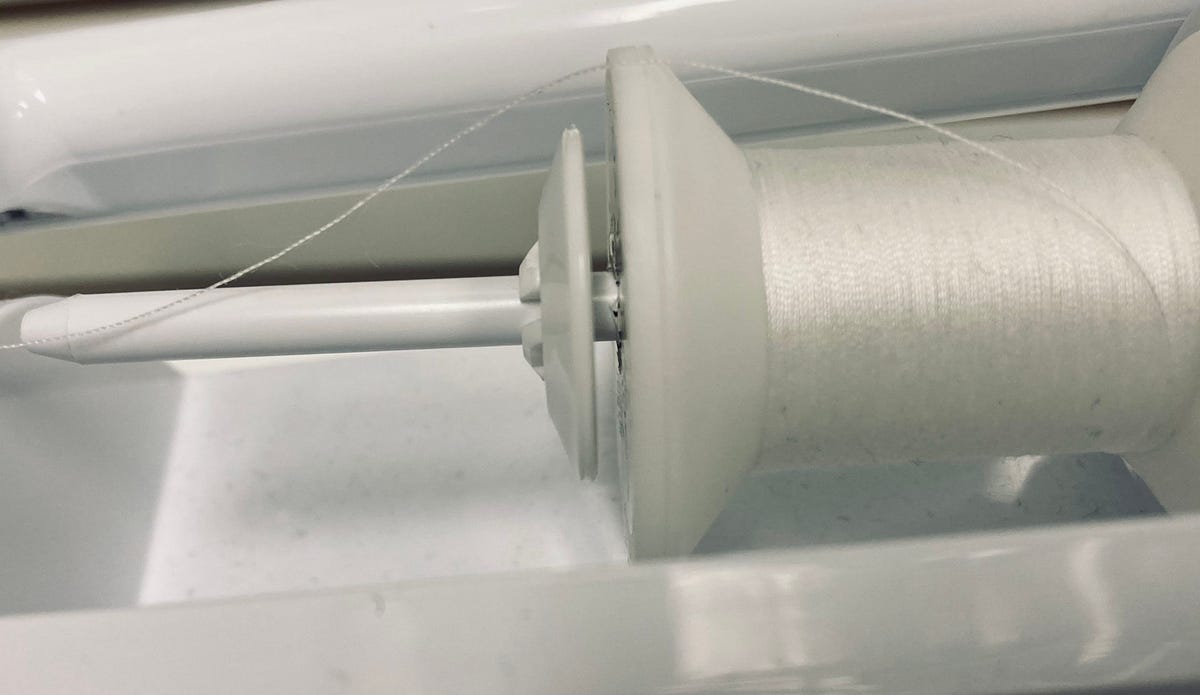
Bad! The spool cap is too small, so the thread passes over the rough edge of the spool. Rule of thumb
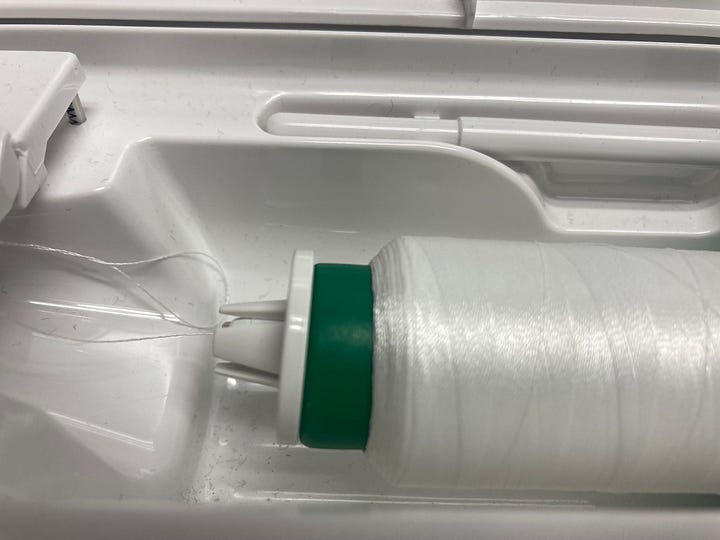
The spool cap should be slightly larger than the end of the spool: not smaller, and not way bigger. Too small and the thread snags. Too large and the cap itself can interfere with thread flow.
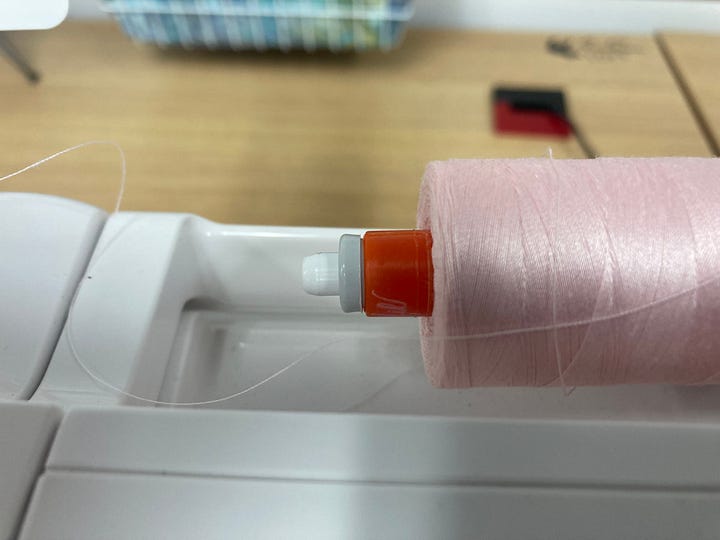
Perfection: the spool cap is slightly larger than the plastic end of the spool.
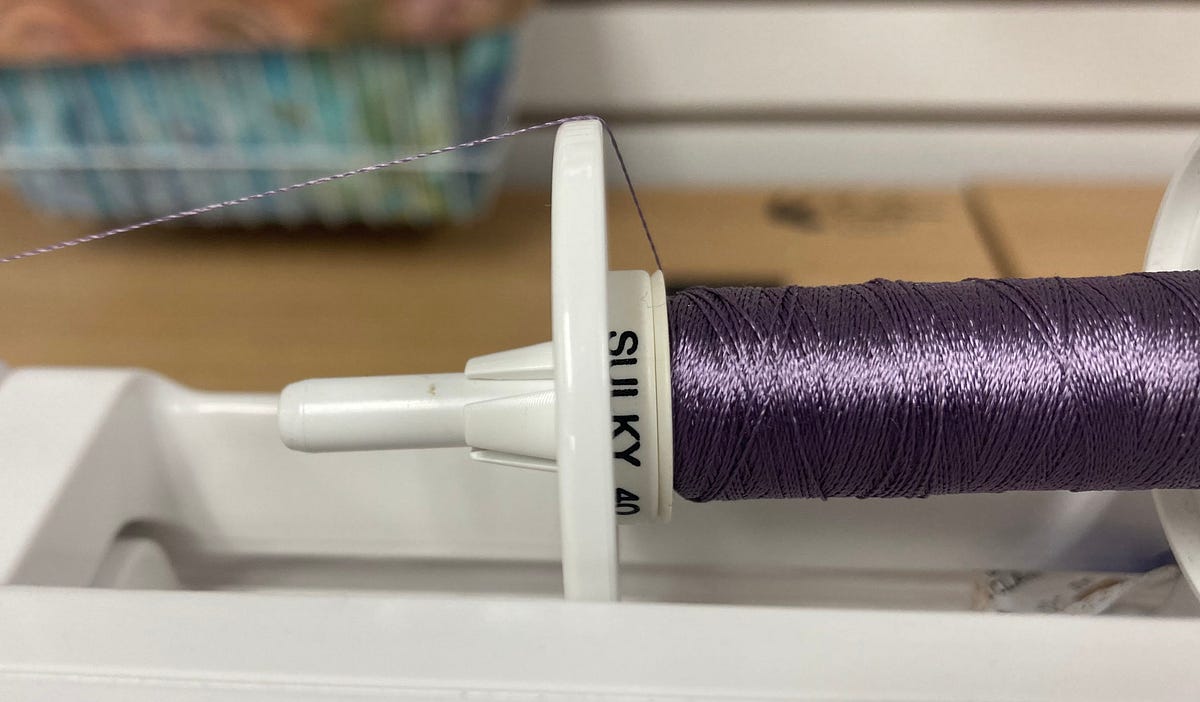
Too big. Slightly larger is the goal, not way larger; an oversized cap can snag the thread too. Many machines come into our shop with this exact issue. Fixing it takes two seconds and saves a lot of headaches.
Read the full articleHow to Choose the Right Spool Cap
Fixed? You’re done. Still breaking? Continue to step 3 ↓
- 3
Do the pull test
You may know the pull test as the cure for loops on the underside of the fabric. So why use it for thread breaking? Because it finds thread snags.
The pull test, demonstrated.
Thread the machine fully, except for the needle, and raise the presser foot. Gently pull the thread. It should move freely, with almost no resistance. If it’s snagging on something, you’ll feel it.
If you feel a snag or drag, find it by process of elimination: slowly unthread the machine, one guide at a time, repeating the pull test as you go. Unthread the needle thread guide and pull again. Still snagging? Keep unthreading. If the snag disappears, the last thing you unthreaded is the culprit, whether that’s a thread guide, the tension discs, the take-up lever, or the check spring. Smooth it out or replace it.
How to do the pull testThe Pull Test: The Cure for Loops on the Underside of Fabric
Fixed? You’re done. Still breaking? Continue to step 4 ↓
- 4
Inspect for burrs
If the pull test is smooth but the thread still breaks, the problem may be in the lower half of the machine. Check for burrs or rough spots on the:
- Needle plate hole
- Presser foot
- Bobbin case and bobbin basket
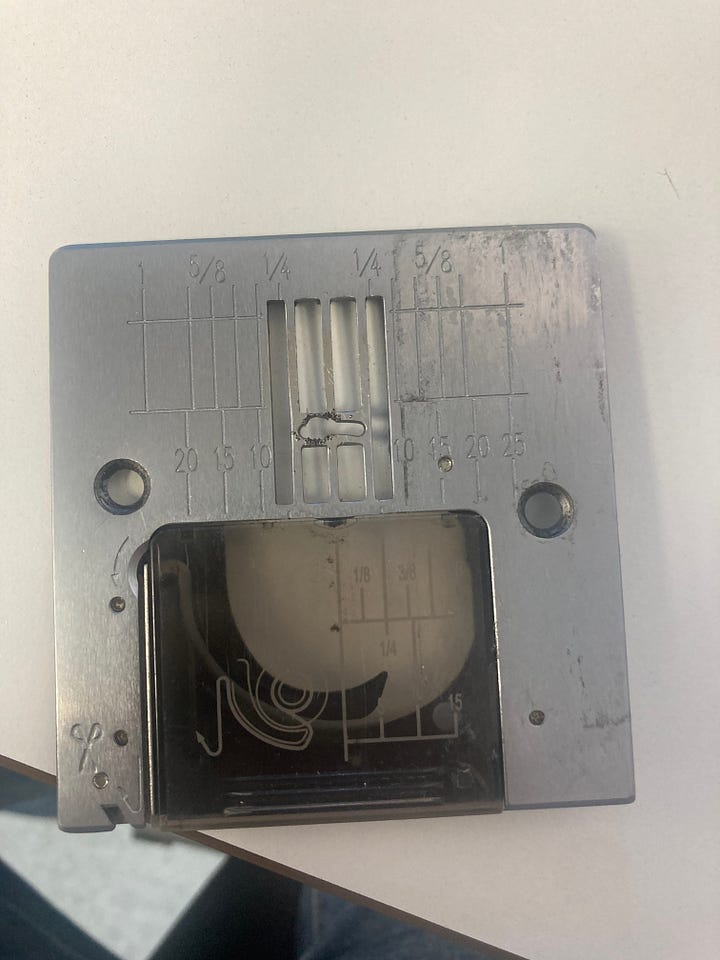
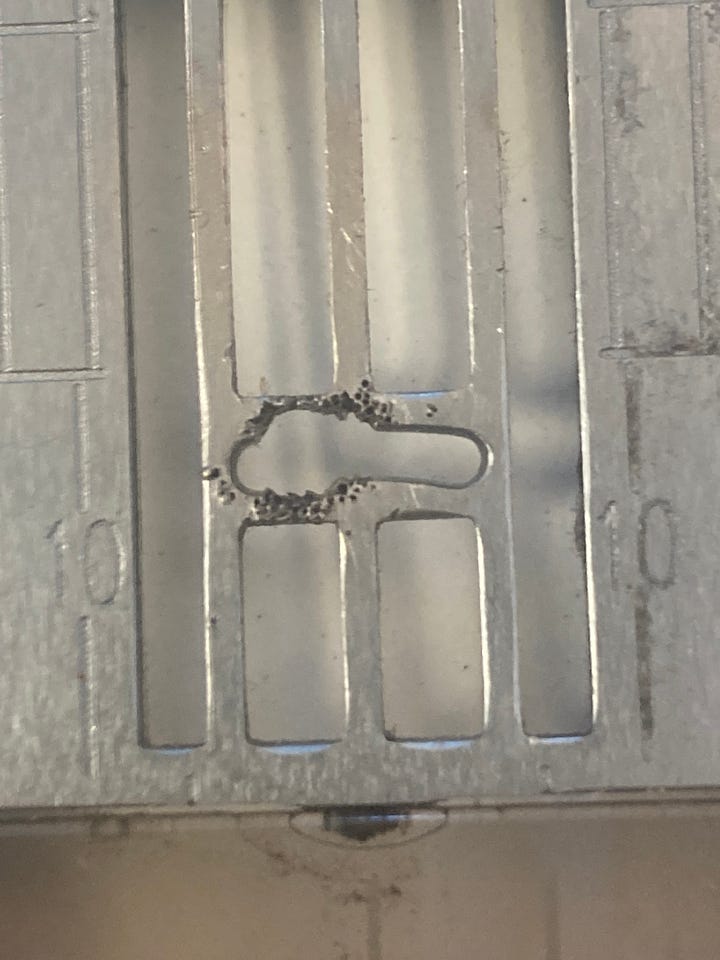
Burrs on the needle plate hole.
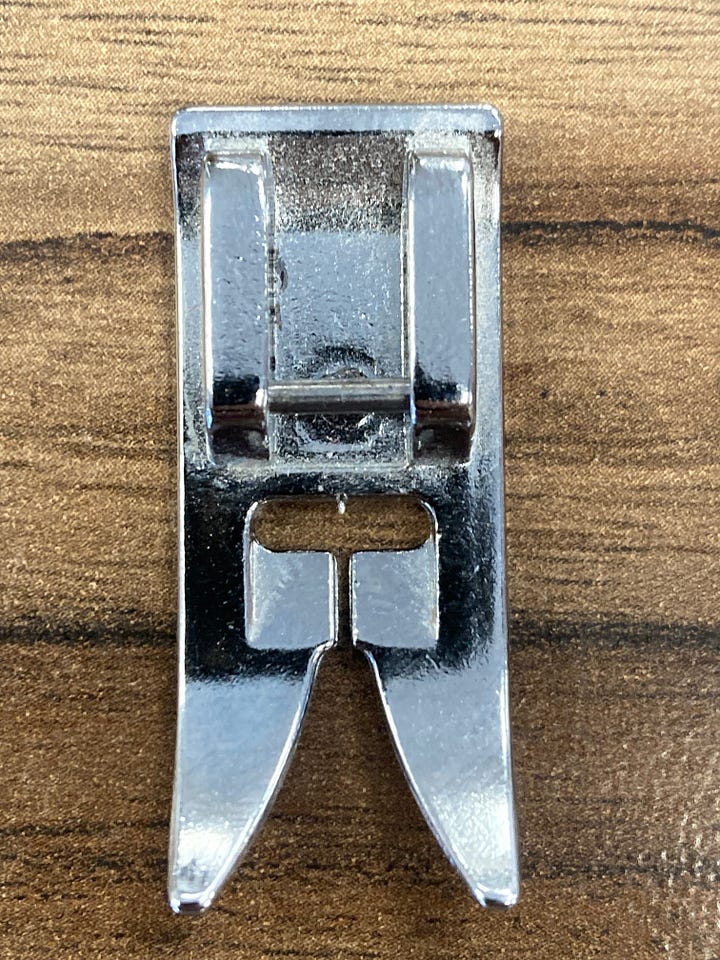
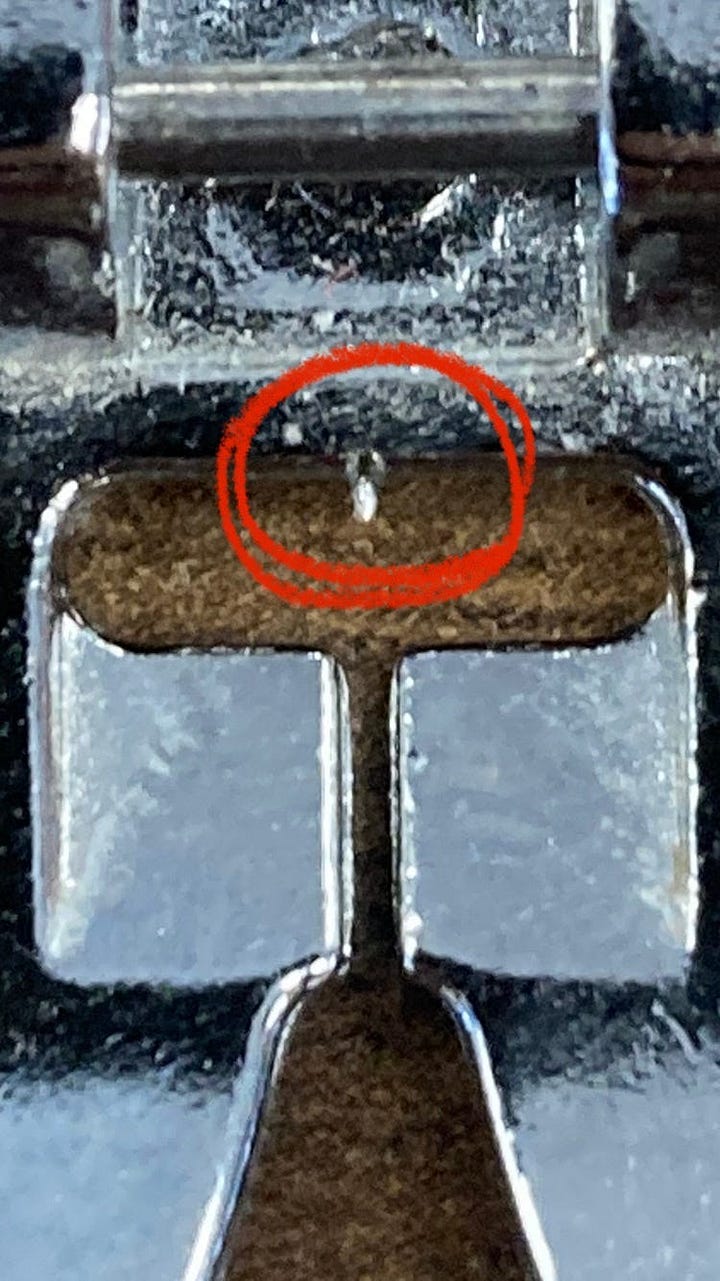
Burr on the presser foot.
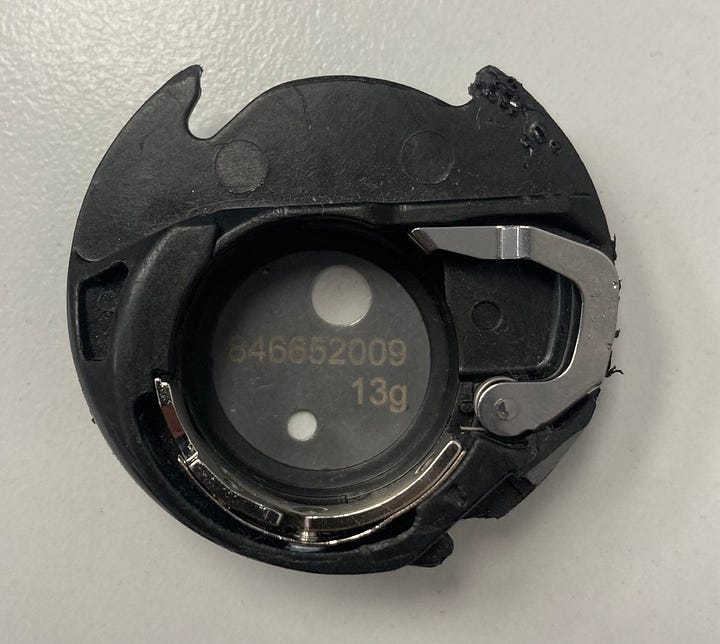
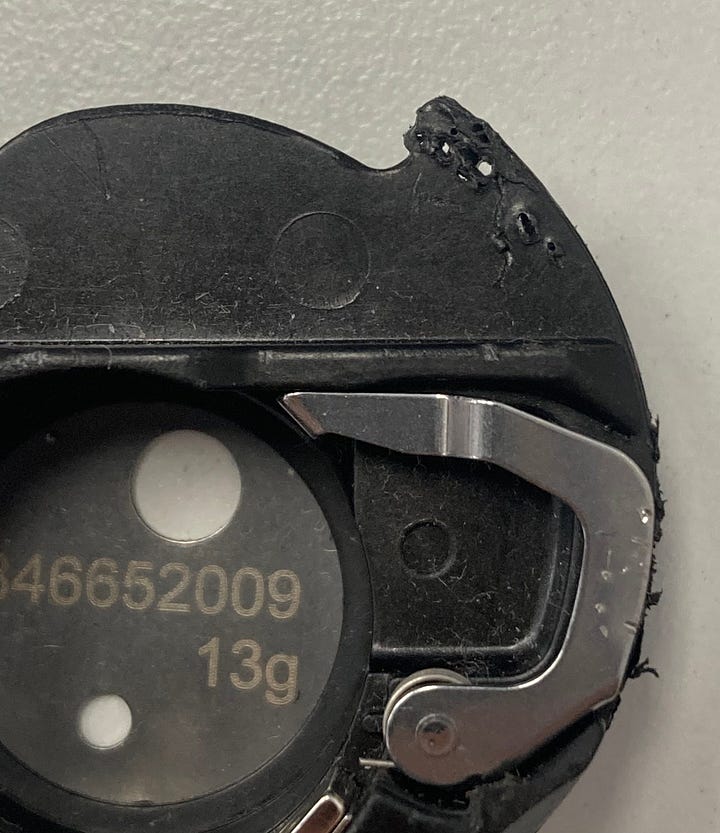
Burrs on the bobbin case basket.
Even a tiny burr can shred thread. Lightly buff it out with emery cord, or replace the part if the damage is severe.
What causes needle strikesDamaged Needle Plate: What Causes Needle Strikes?
Fixed? You’re done. Still breaking? Continue to step 5 ↓
- 5
Check for adhesive buildup
If you sew with adhesives (sticky stabilizers, fusible products, or Velcro), inspect the bobbin, bobbin case, and hook for residue.
Excess or poor-quality adhesive can gum up the lower mechanism, so the thread sticks and snaps as the machine cycles. Minor buildup can often be cleaned carefully at home; heavier buildup may need a technician to disassemble and clean the machine.


Still breaking after step 5?
Bring it to our repair bench
Some causes of thread breakage are subtle and maddening, even for professionals. I’ve seen plenty of repairmen throw their tools in frustration chasing this one. Our technicians in Walnut Creek will track it down.
Thank you for reading!
If you found this guide helpful, pass it along to your fellow sewists.
— Cale
More troubleshooting
