
Sewing Machine Needle Plate Examination
Sewing Machine Deep Dive
The needle plate is the barrier between the top half of your sewing machine and the bottom half. Look closely, and it reveals a ton of clues about the inner workings of the machine.
I’ve written well over 100 articles on sewing machines, and I’m not sure I’ve ever given the needle plate its due. When I first brainstormed this one, I assumed there wouldn’t be much to say. The more I thought about it, the more I found.
It reminds me of my favorite class in college, where I read Wittgenstein’s Tractatus Logico-Philosophicus. He points out that the world is made up not merely of things, but of things and the facts about those things. Likewise, a sewing machine is made up of its parts, but to really understand it, we ought to look at the facts about those parts too. And there are a lot of needle plate facts.
So I’ve structured this as a list of needle plate facts. Some may seem obvious, but it helps to see them all together.
— Cale
The Hole Reveals Maximum Stitch Width
5.5 mm, 7 mm, or 9 mm
As far as I’m aware, every modern sewing machine made in the past 50 years has a maximum stitch width of 5.5 mm, 7 mm, or 9 mm.
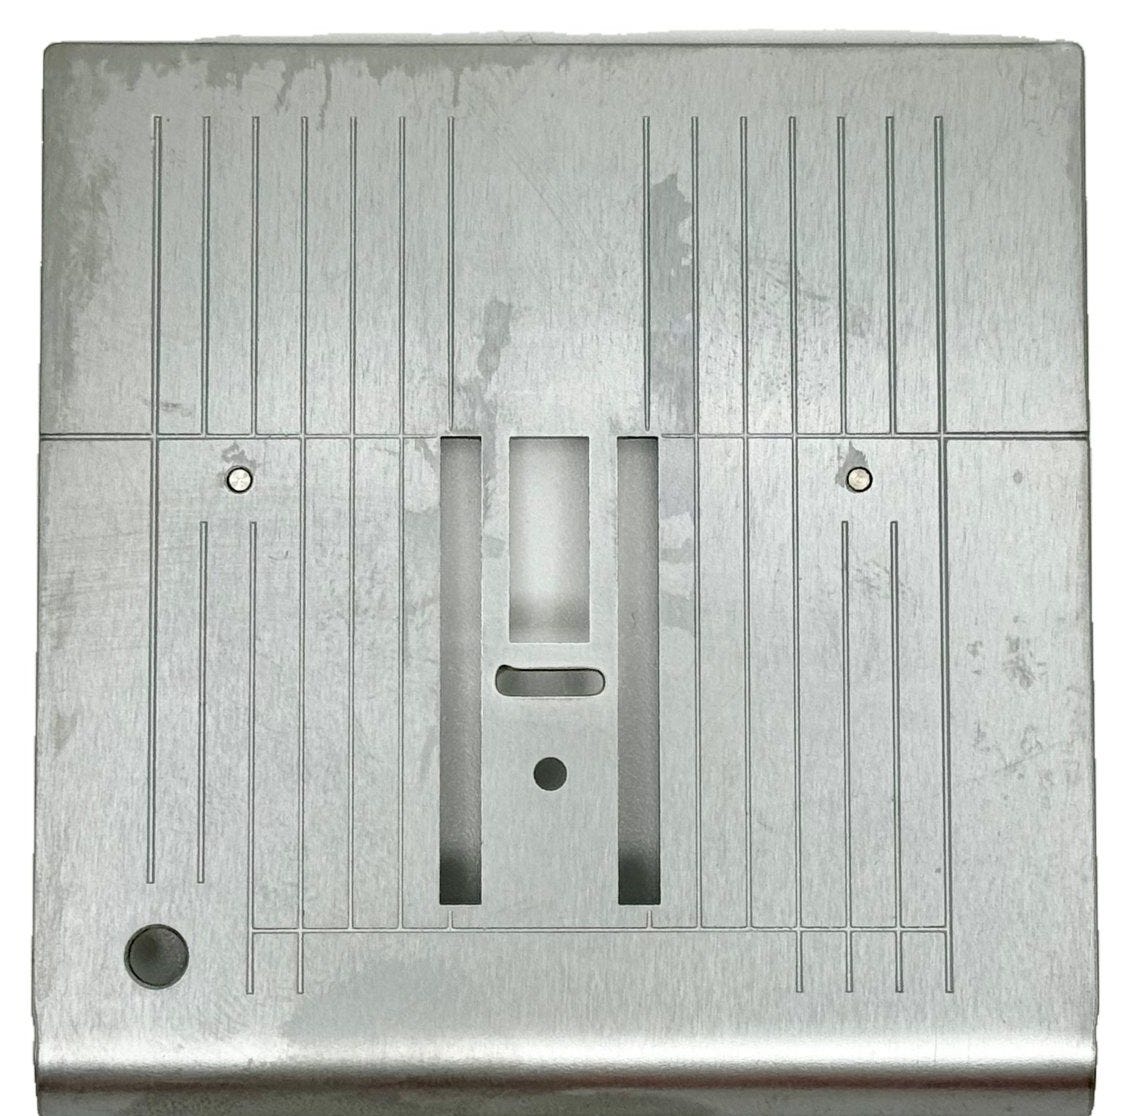
If you want a clear picture of how wide your zig-zag can go, or the largest a decorative stitch can be, look at the oval hole between your feed dogs. Unless your machine has side-motion feed, the width of that hole is the machine’s maximum stitch width.
The Hole Reveals the Width of the Feed Dogs
Wider stitch, wider feed dogs
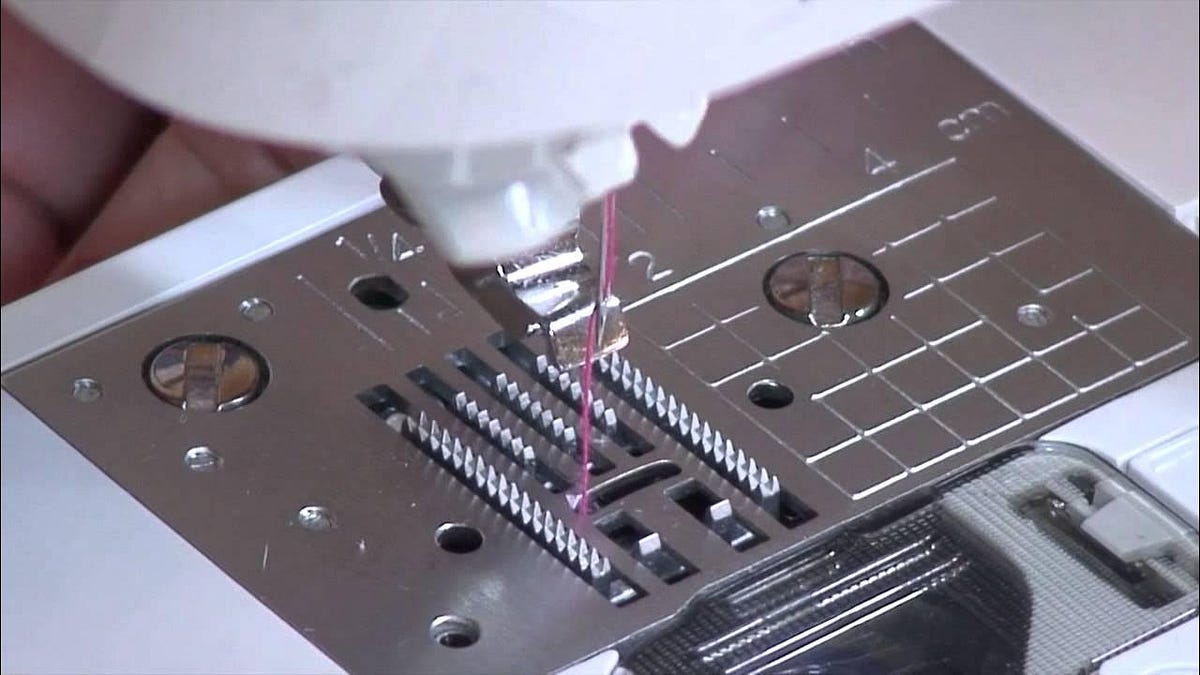
A more interesting fact: the maximum stitch width determines the width of the feed dogs. The needle can travel only as wide as the needle plate hole allows, and the feed dogs sit on either side of that hole. So the feed dogs on a 9 mm machine are wider than on a 7 mm machine, which are wider than on a 5.5 mm machine.
Why does that matter?
Some people don’t like very wide feed dogs, because they make it a bit harder to steer fabric around curved seams. The machine naturally feeds the fabric straight, so to curve, we have to guide it ourselves, and that’s easier when the feed teeth grip a smaller area of fabric.
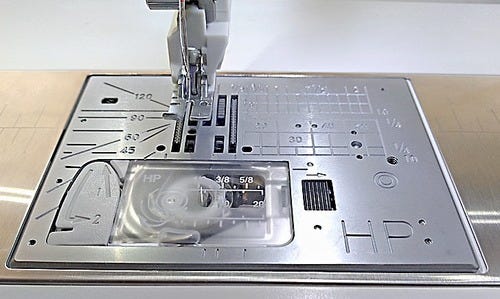
You could also argue we get better control and precision when the needle sits closer to the feed teeth. Sew a straight stitch on a 9 mm machine with the needle centered, and the needle is relatively far from those long rows of feed dogs. That’s exactly why Janome invented the HP plate: a straight-stitch needle plate with the hole pushed as far left as possible, hugging the left row of feed dogs for maximum control.
Straight-Stitch Plate vs. Zig-Zag Plate
Support the fabric, stop the puckering
What’s the purpose of a straight-stitch plate? The short answer: better stitch quality. The better answer: better stitch quality because a straight-stitch plate supports the fabric better than a regular zig-zag plate.
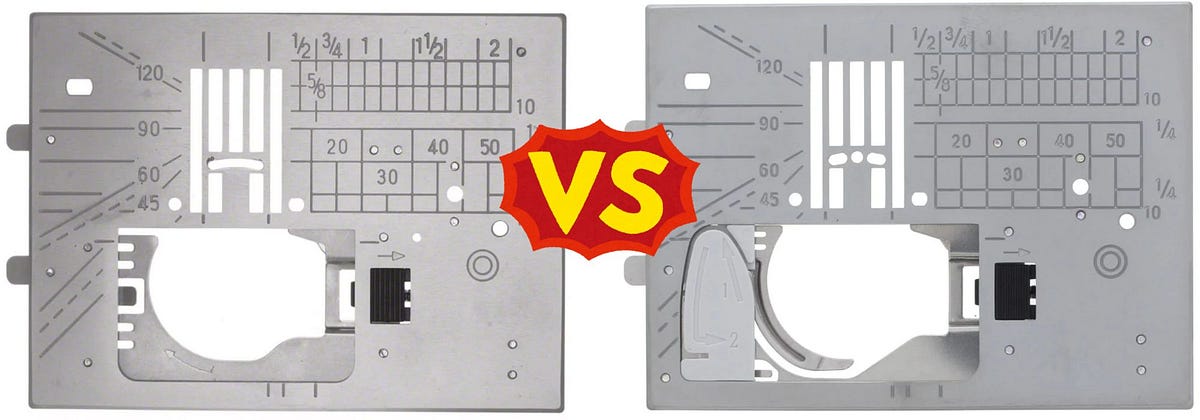
A standard needle plate has a hole 5.5, 7, or 9 mm wide, and that’s a hole your fabric can get pushed or “sucked” down into. It’s one of the major causes of fabric puckering. If the fabric is pushed down into the opening while the needle forms the stitch, the stitch locks in while the fabric is distorted, and the pucker stays even after the stitch is done.
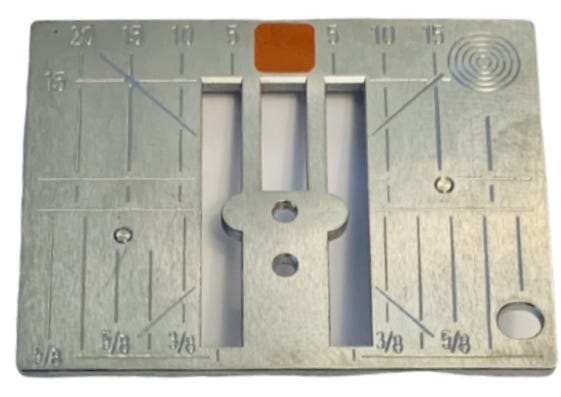
With a straight-stitch plate, there’s much less empty space around the needle hole, so the fabric has nowhere to collapse into, which dramatically lowers the chance of puckering. Manufacturers know this, which is why they make straight-stitch plates for nearly every machine.
If you occasionally get puckering, or simply want the best possible stitch quality, I recommend using a straight-stitch needle plate.
Straight-stitch needle plates


Needle Strikes
What the burrs tell a technician
A relatively common issue we see is needle strikes that damage the needle plate hole. Once that area gets chewed up, it can cause stitch quality issues or even thread breakage.
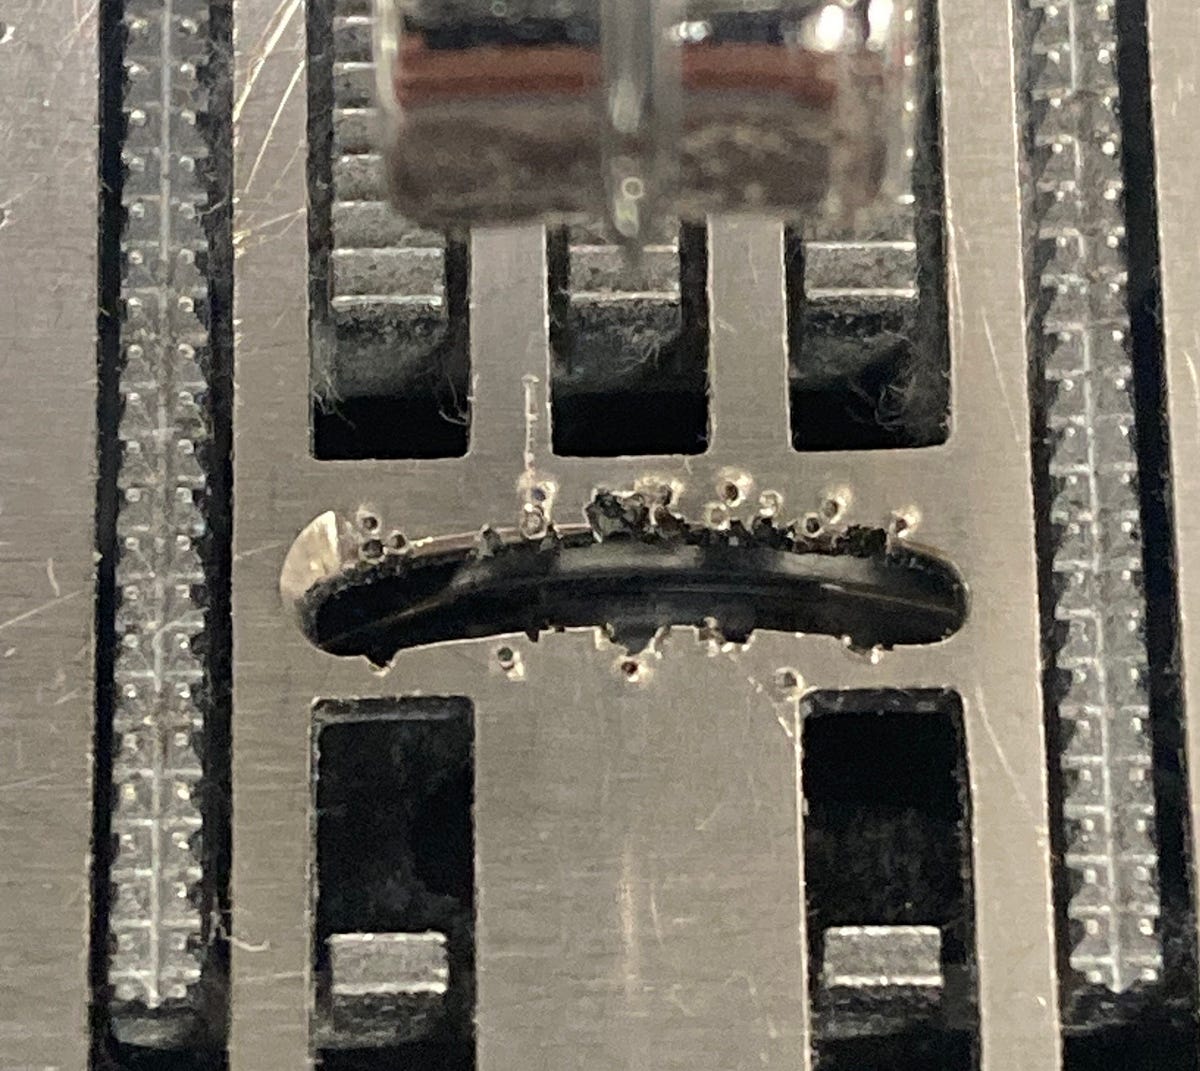
Needle strikes are most often caused by needle deflection. When I see a series of heavy strikes on a plate, it’s usually a telltale sign the owner has been sewing heavy fabric that the machine struggles to feed. To compensate, they push the fabric themselves, often while the needle is still down. That push shifts the fabric (and the needle) off its intended path, and the needle collides with the plate.
The needle can also deflect if you sew over a hard object like a pin or zipper, or if feed timing is out of whack.
Strikes are a real problem because the thread must pass smoothly through the needle plate hole to form a proper stitch. Sharp burrs can catch, snag, or cut the thread, leading to thread breaks and inconsistent stitches.
Fixing a damaged needle plateDamaged Needle Plate: What Causes Needle Strikes?
Cleaning Underneath the Needle Plate
The most important place to clean
Of all the areas you can clean on your machine, the space underneath the needle plate is the most important. It’s where the dance between the hook, needle, thread, bobbin, bobbin case, and feed dogs takes place.
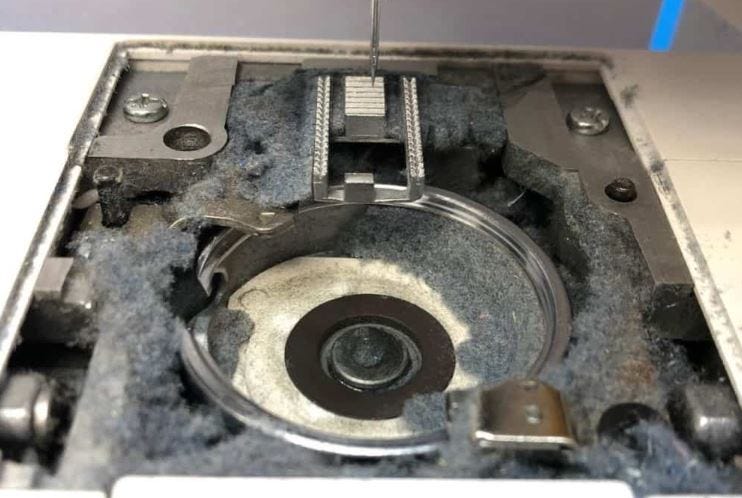
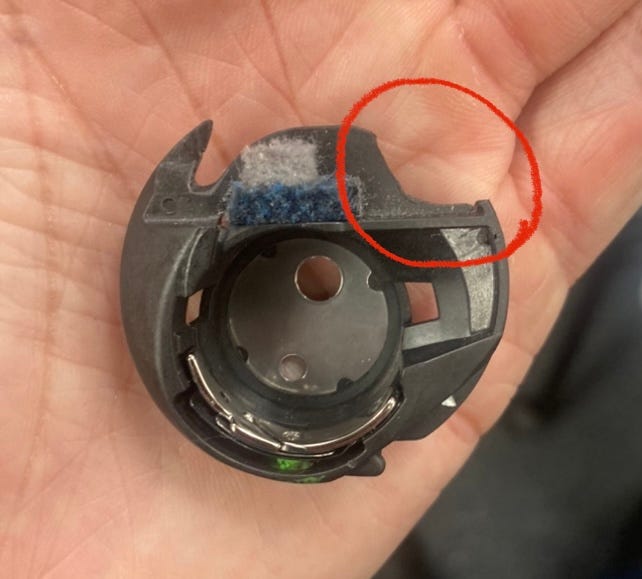
A common issue, especially on horizontal rotary hook (drop-in bobbin) machines, is compacted lint that gathers beneath the bobbin case and jars it off the hook race it sits on. Once the bobbin case is even slightly out of position, it’s much more likely to shift into the path of the needle, leading to a traumatic crash that can damage the needle plate and potentially throw the machine out of time.
Another common issue: so much lint builds up between the rows of feed dogs that it pushes up against the needle plate and makes it bow. Then the feed dogs can’t rise high enough above the plate to grip the fabric, and the machine feeds poorly.
That’s all to say: remove your needle plate occasionally and clean out the compacted lint.
Read the full articleHow to Clean a Sewing Machine
Cleaning under the plate


Thank you for reading!
If you found this helpful, share it with your fellow sewists.
— Cale
Keep learning
