How to Set Tension on a Sewing Machine
How to Set Tension on a Sewing Machine
To learn how to set tension on a sewing machine, it’s important to understand that a sewing machine machine uses two sources of thread to make a stitch:
- Needle thread (upper thread)
- Bobbin thread (lower thread)
When a sewing machine makes a stitch, it is essentially tying a knot between the needle thread and bobbin thread.
When the tension is balanced (good), the knot sits in-between the multiple layers of fabric we are sewing (holding the fabric together).
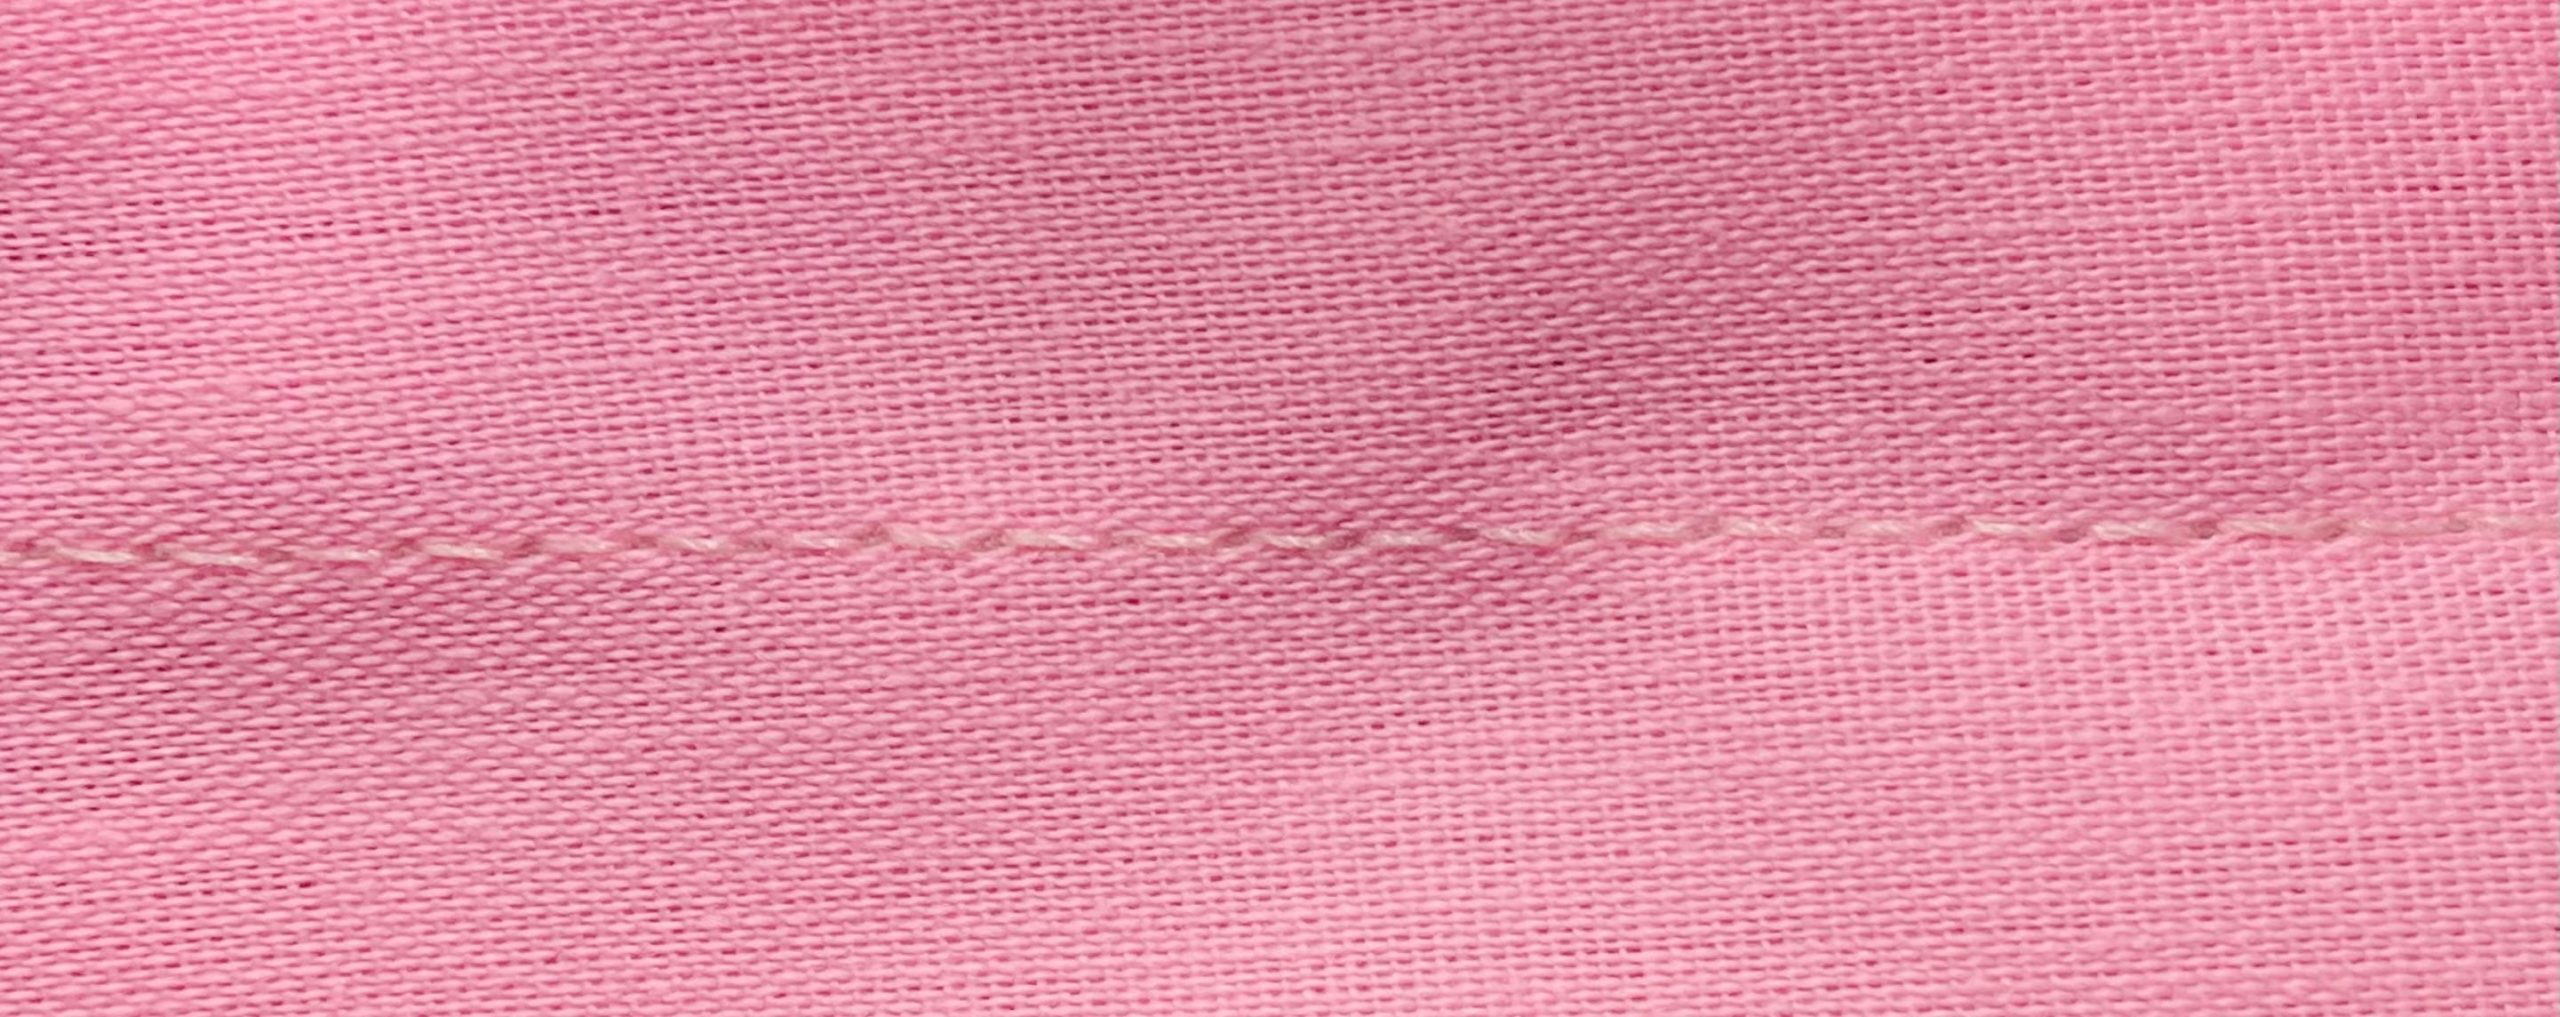
perfect sewing machine thread tension
When the tension is unbalanced (bad), the knot will poke out one side of the fabric, either the top or bottom. In such cases, you might perceive the stitch as “loose” or “bumpy” or that the thread can easily be pulled out.
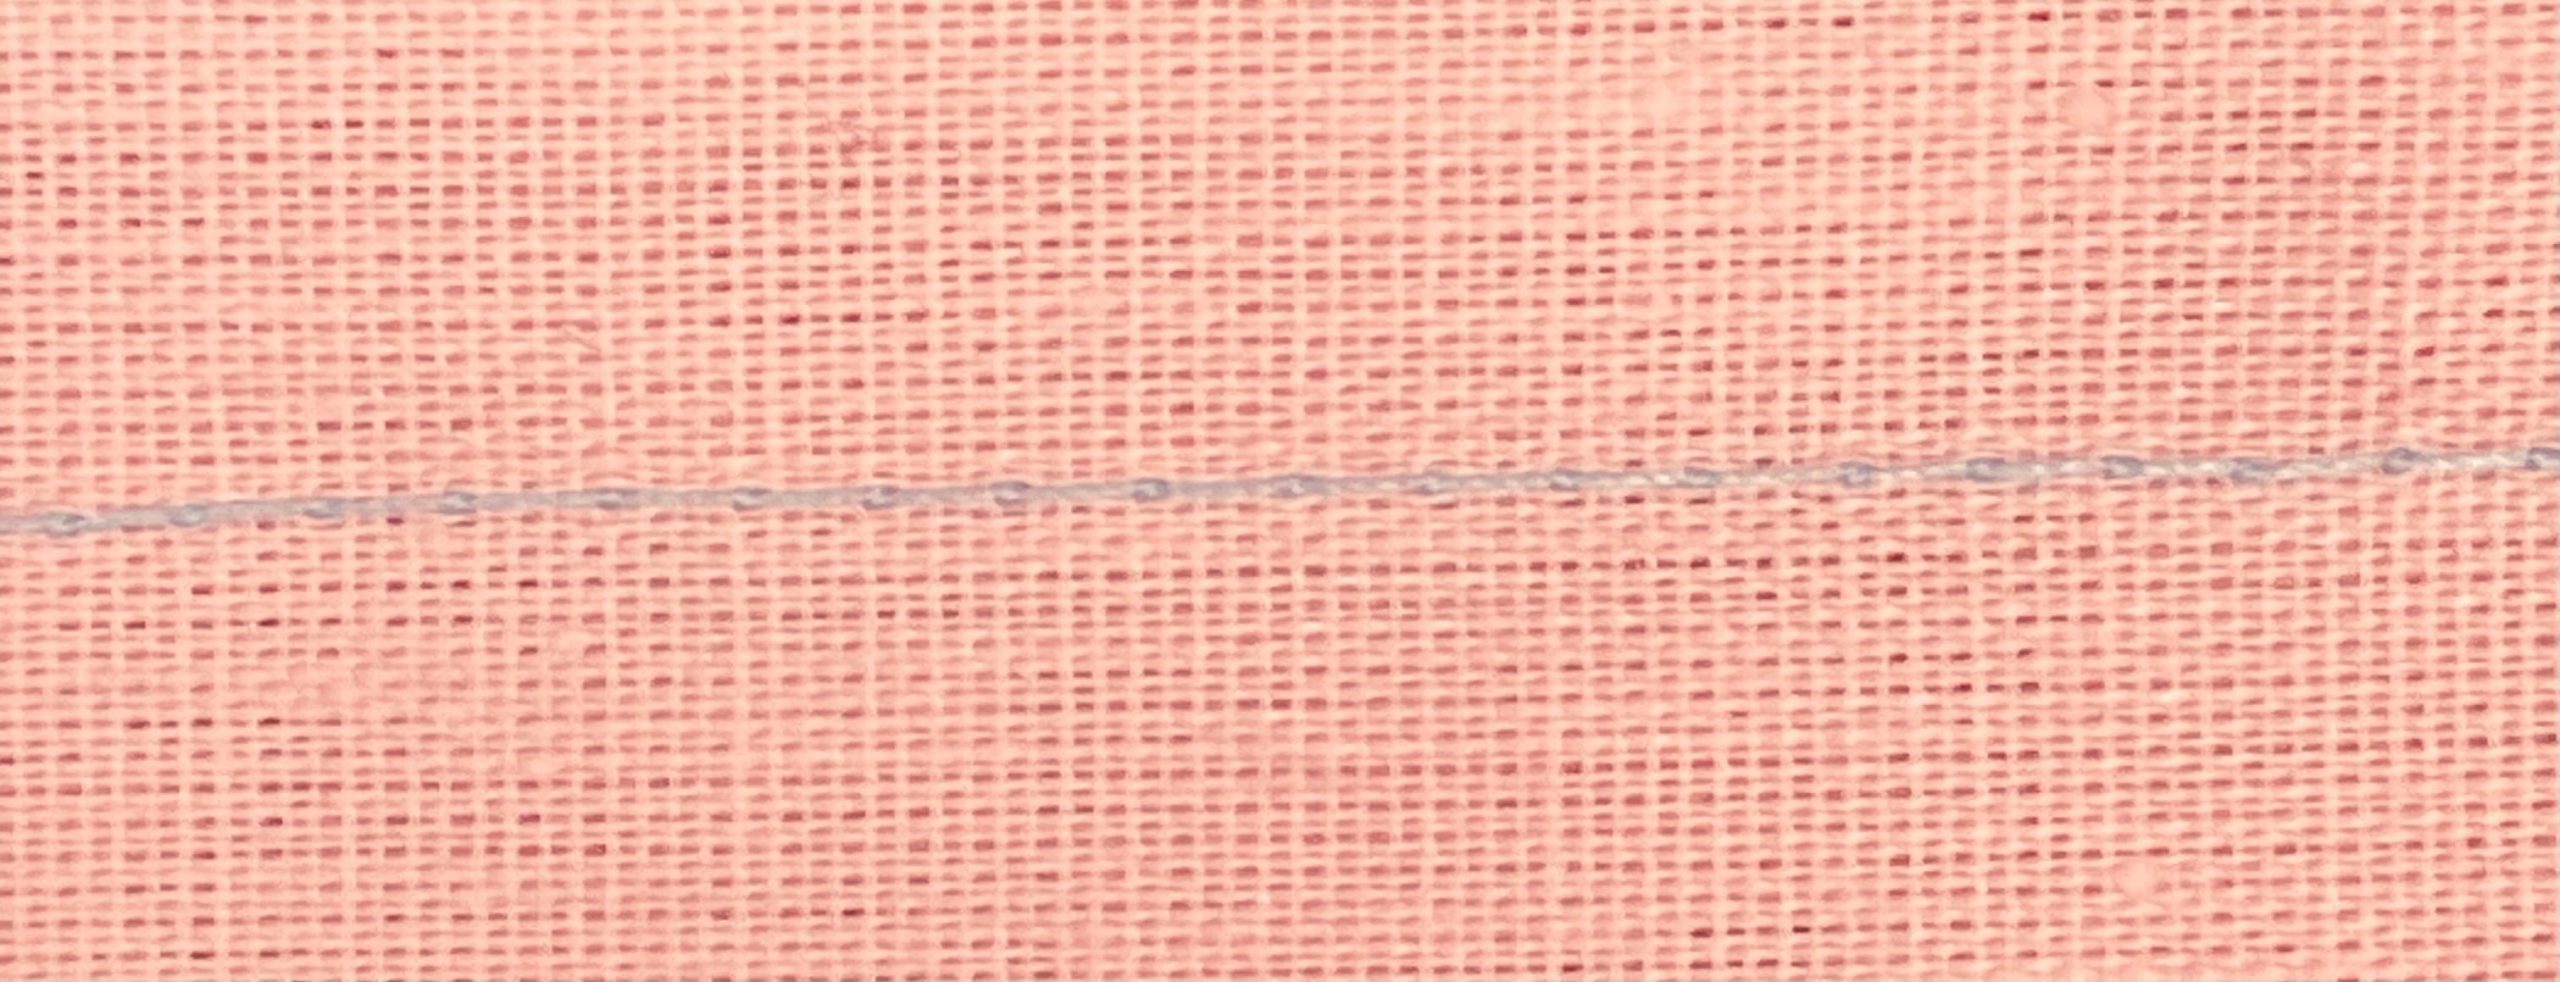
poor sewing machine thread tension
How to Set Tension on a Sewing Machine
The thread that goes through the needle (upper thread source) begins at the spool and passes between the machine’s upper tension discs:
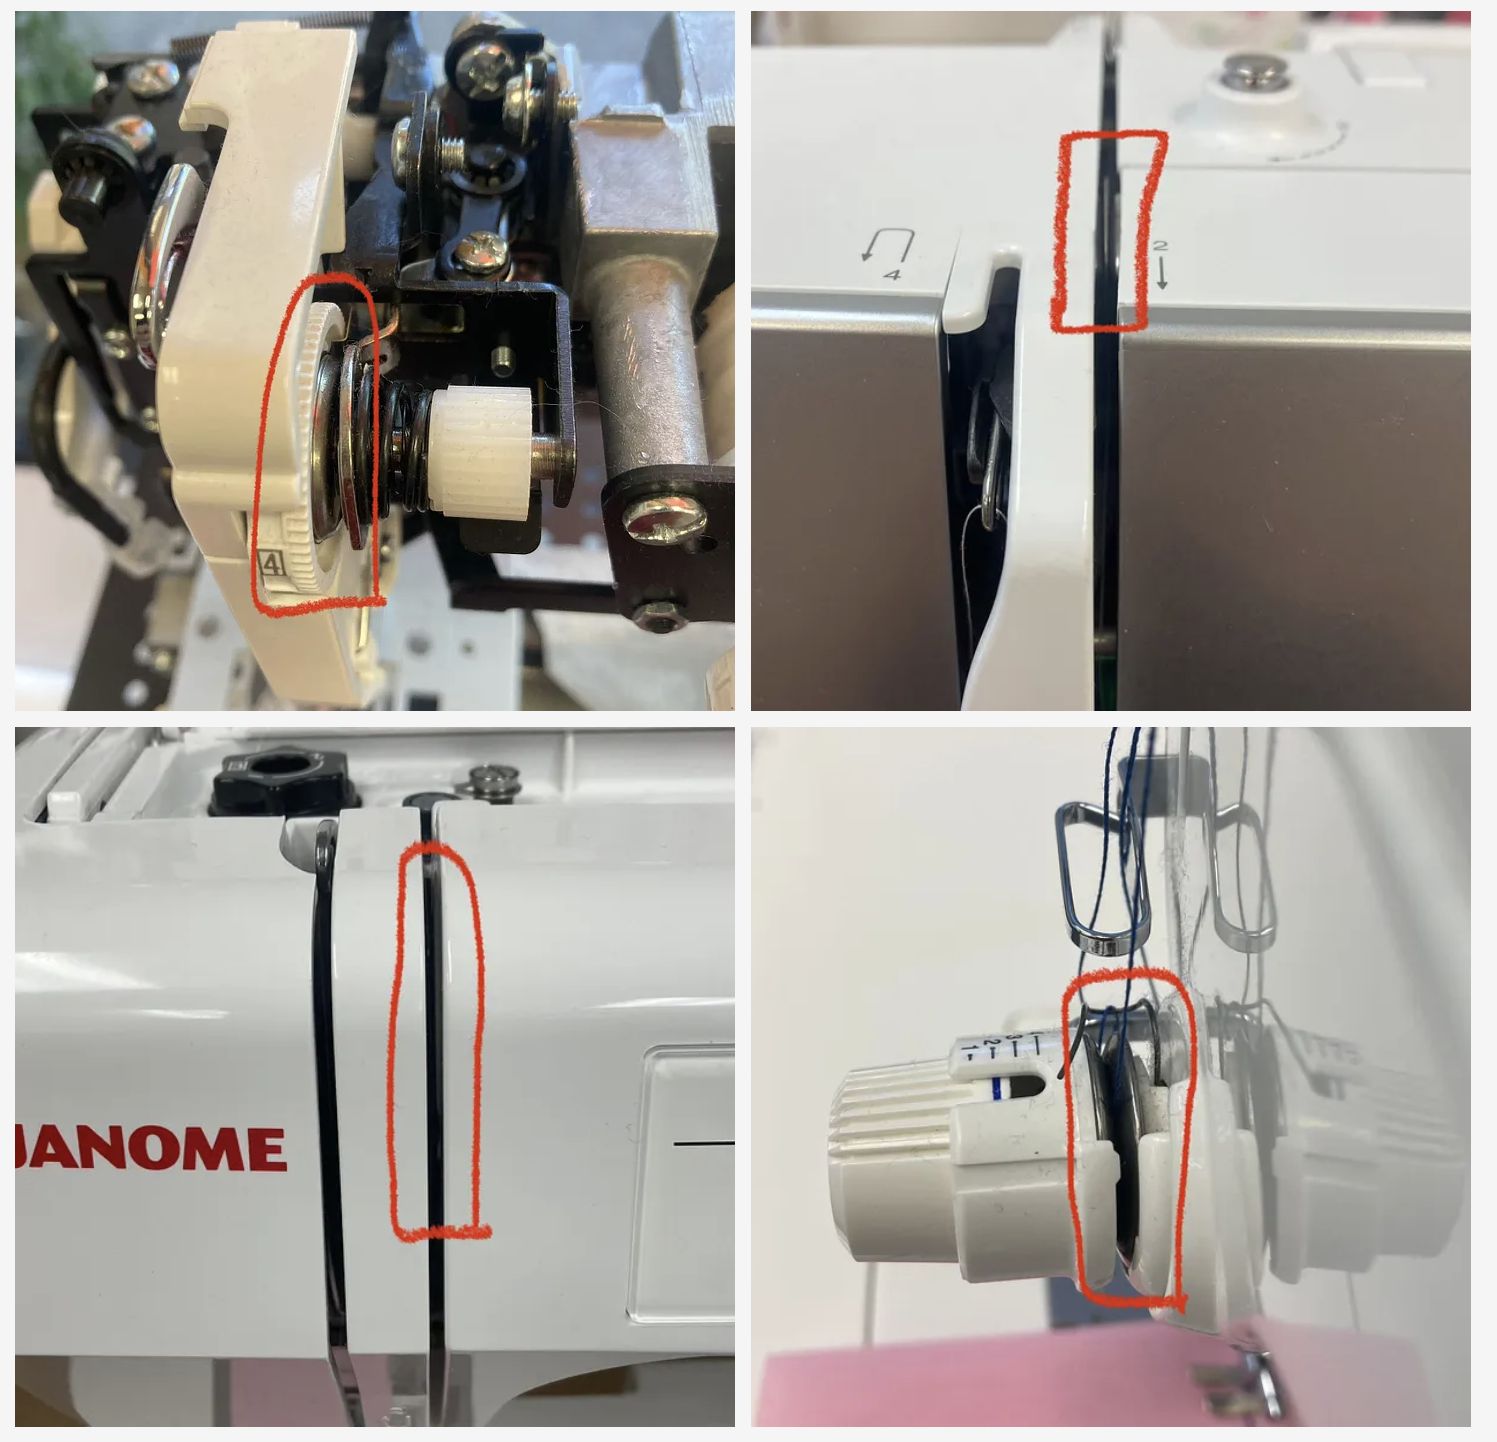
sewing machine upper tension discs
Meanwhile, your bobbin thread passes between the bobbin case tension discs:

sewing machine bobbin case tension discs
While we have the ability to adjust both the upper tension and bobbin case tension, I highly recommend you use the upper tension dial to balance tension. The bobbin case tension can only be adjusted by turning a very small screw that is sensitive and difficult to calibrate. Meanwhile, the upper thread tension dial is highly accessible to the user. It is often numbered between 1 and 10, with 1 being the lightest tension and 10 being the tightest tension.

sewing machine upper tension dial
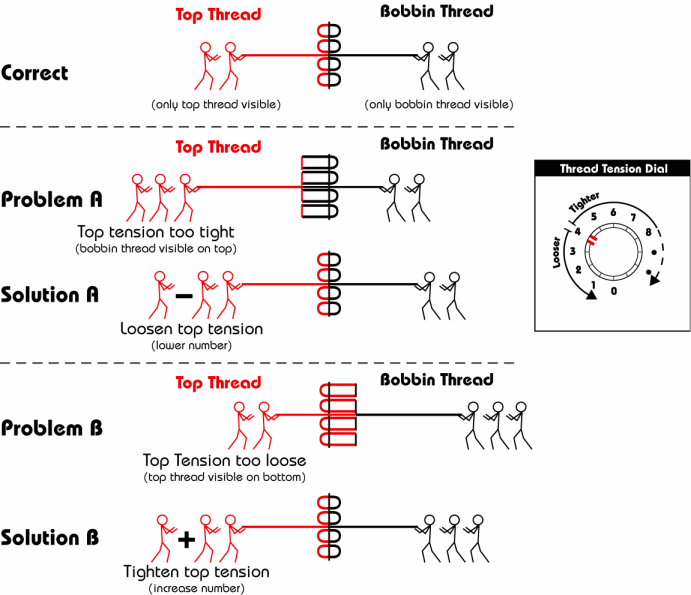
Think of tension as a tug-of-war between the upper thread and bobbin thread.
Remember, perfect tension means the knot sits in-between the layers of fabric we are sewing.
If the knot pokes out the topside of the fabric, that means the upper tension is overpowering the bobbin tension. In this instance, decrease the top tension (e.g. turn tension dial from 4 to 3) so that it’s easier for the bobbin case tension to pull the knot down into the fabric.
If the knot pokes out the underside of the fabric, that means the bobbin case tension is overpowering the top tension. In this instance, increase the upper tension (e.g. turn tension dial from 4 to 5) so that the upper thread can pull the knot back up into the fabric.
how to set sewing machine tension
Balancing tension requires trial and error. Patience is key. Sew a seam, observe where the knot sits, then adjust tension accordingly.
Most machines have an upper thread tension dial that goes from 0 to 9. Typically, we should be able to achieve balanced tension with the dial set between 3 and 6, but there may be the rare occasion where I have to go all the way or all the way down in order to achieve a quality stitch. Don’t be afraid to use the full spectrum of the sewing machine’s upper tension dial. That 0 to 9 range exists for your benefit. It’s okay to turn the dial to the extreme ends of the spectrum, but if you do need to go to 1 or 9 in order to get a good stitch, then there is something wrong with your machine and you should consider taking it to a trained sewing machine technician in the near future.
Notes on “Automatic Thread Tension”
Many modern sewing machines tout an “automatic thread tension” feature.
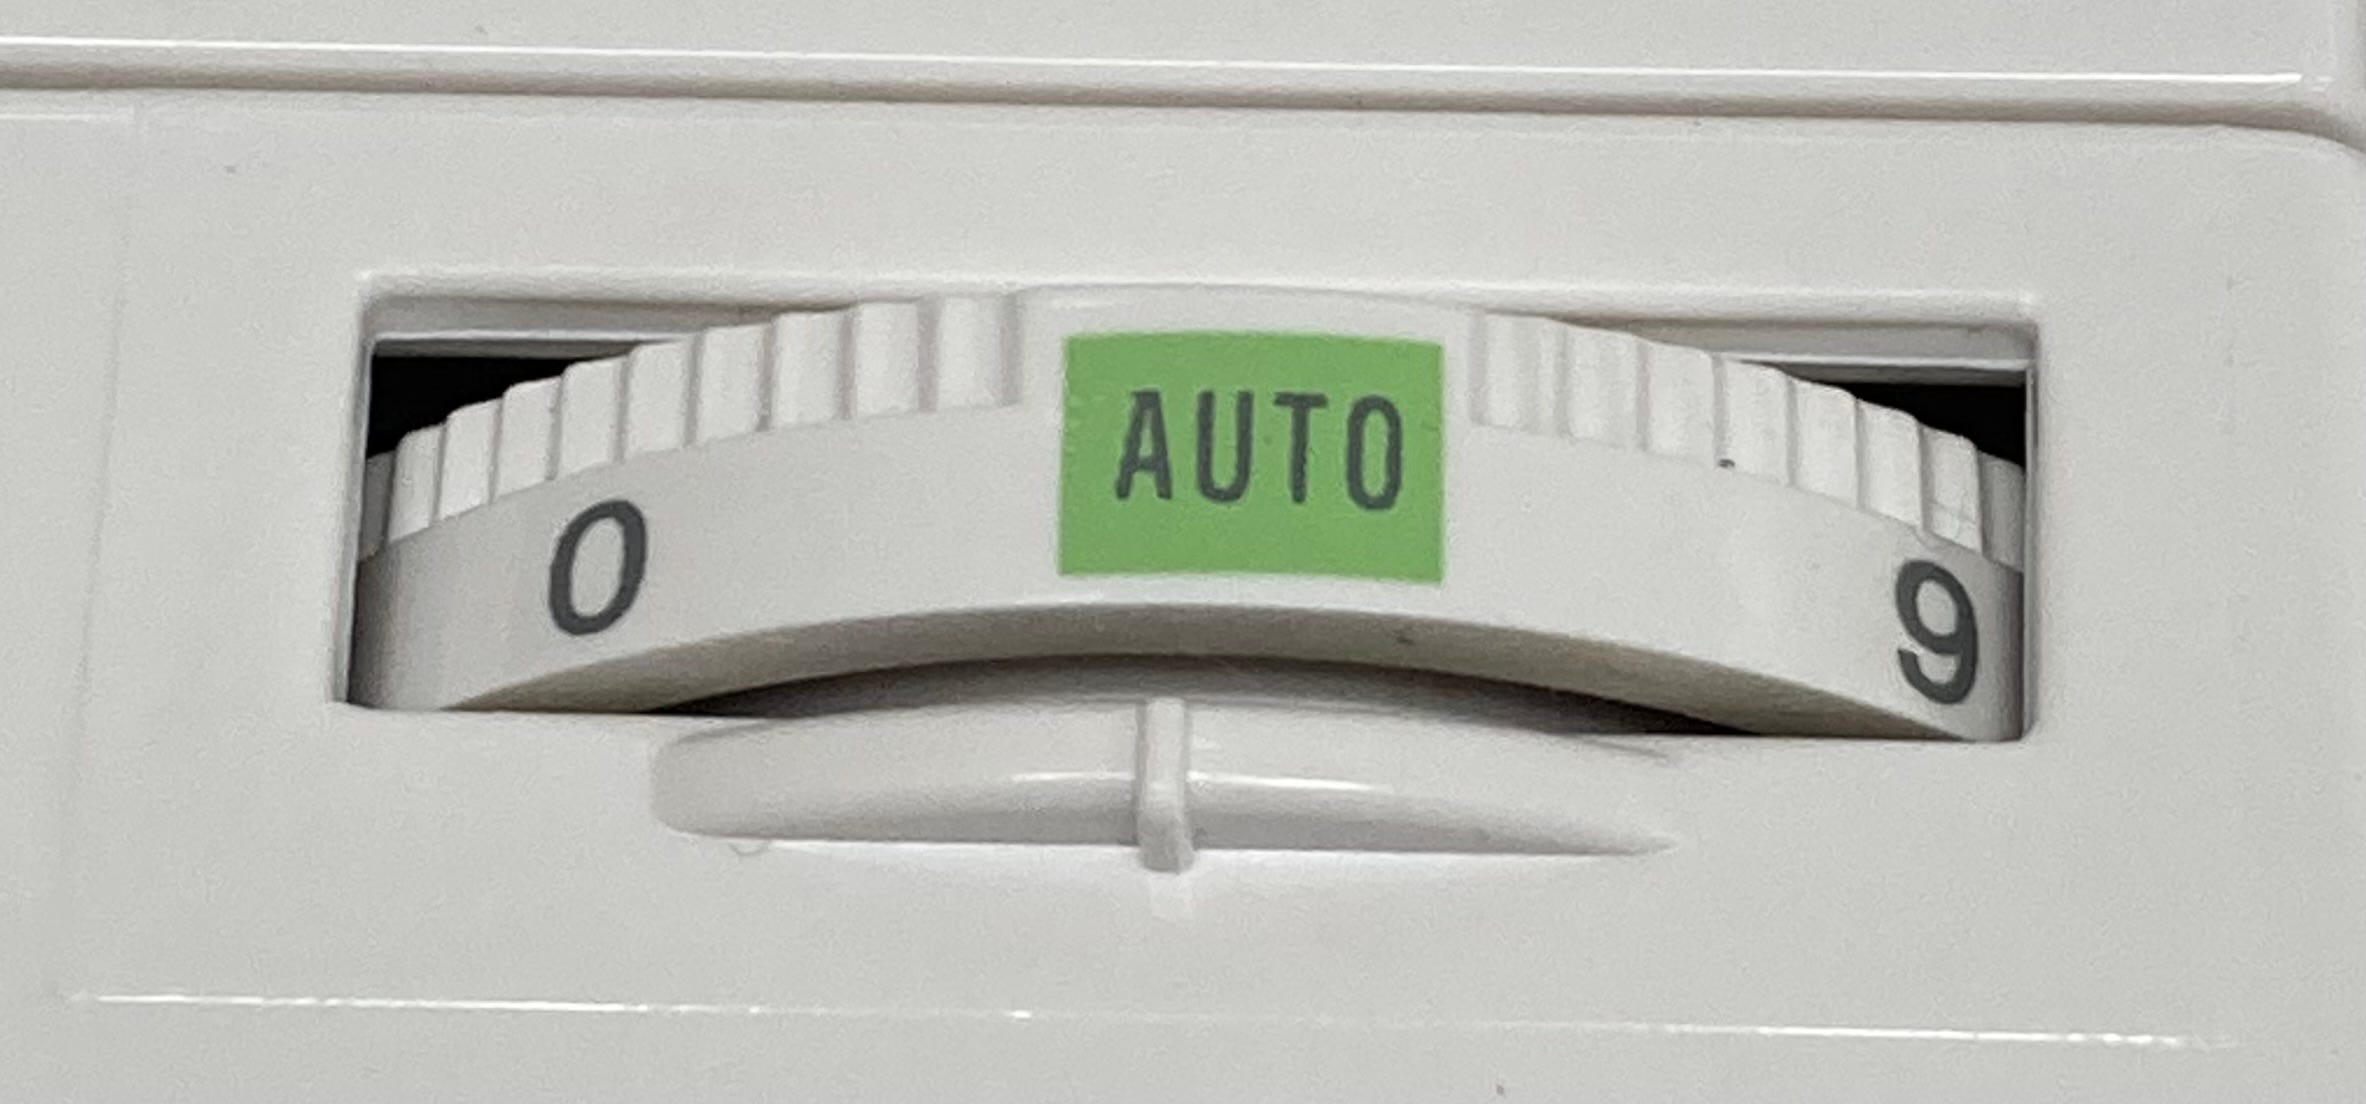
automatic tension dial on sewing machine
If a machine has “automatic tension”, it means the upper tension discs automatically adjusts based on the stitch pattern that the user has selected. For example, your straight stitch tension will be set automatically at 4, but your zig-zag tension is automatically set 3.
These changes in tension are based on research from the manufacturers’ research and development teams. Essentially, they have programmed an educated guess as to what they judge to be the ideal general top tension on straight stitch vs zig-zag vs decorative, etc.
While I like the feature in itself, I am not a fan of the term “automatic tension” because I think it is misleading. “Automatic tension” does not actively adjust tension based on the stitch quality of the machine. It does not “feel” the thread between the discs and adjust automatically, nor does it “feel” the thickness of the fabric.
If you have a machine with “automatic tension”, but your tension is unbalanced, I recommend you set the upper tension to 4 and sew a straight stitch to see where the knot sits, then go through the tug-of-war tension re-calibration process described earlier.